Friday, March 27, 2009

Back to Work

Alas, all good things must come to an end.

My virtual retreat will actually come to a screeching halt just before noon today. This is the weekend that I send my staff on retreat. Working for me is such a joy that I don’t completely understand their need to get away, but I send them anyway.

Each year I treat them to a weekend at a retreat center near Wheeling West Virginia. As a professional woman I should tell you that they are there for team building and staff development. In reality they are there to sew until they can no longer see straight, giggle and laugh until their sides hurt and eat themselves silly.

In order for that to happen, I stay home and work the shop. The retreat doesn’t really begin until dinnertime so our normal Friday staff will show up for work. They will immediately begin to pout and keep it up until I shoo them out of here, usually before noon. That requires that I get all of my “work” done before they leave so that I am free to work the sales floor later today. With a sales staff of one all afternoon, I won’t have any time for sewing! (I did stay late last night and cut out a new version of our Uptown Tote using the beach babes fabric and the coordinating polka dot. If the store is slow, I may squeeze in a seam or two!)

I have asked them to take photos of what they accomplish over the weekend. If I can get them to email them to me I will share them with you. Then you can see what my staff is able to accomplish while I do their job!
If you are inspired to sew this weekend, send me a photo of what you accomplish and (with your permission) I will post those photos too!
Now go sew something!
Karen

Thursday, March 26, 2009

DETOUR!

I have taken a quilting detour into the home decorating world. There is a very good chance that we will be having a house full of company in the near future and company is exactly what I need to force me into finishing the valance for the window above my kitchen sink. The painting and wallpaper were completed last fall; months after the new kitchen counters started this long drawn out project. (How DO those home improvement shows manage to get everything done in 24 hours?) Now the only thing left is the window treatment. Nothing spurs me into action like a deadline!

This whole project will probably take less than an hour. This is my Easy Reversible Valance. We have a laminated card with the step-by-step instructions, but here is a quick overview.

First you have to select 2 fabrics. My “new” kitchen is red and tan. These photos are of the demonstration pieces that I keep at the shop. The violets are leftover pieces from my oldest daughter’s bedroom – 10 years ago!

The instruction card gives you measuring details so that you can calculate the yardage. It is a simple formula. You fill the measurements into the blanks in the formula and follow the calculations to determine the yardage.

Step one is to sew the two identically sized pieces of fabric together to make a long tube. You may be able to see that I serged these pieces. I own a serger, why not use it? If you don’t own one, a simple seam works just as well. A quarter inch seam allowance would be great, but not necessary.

Once the long seams are done, fold about (and I do mean “about”) an inch of fabric toward the inside and press. If you are hard-core you can stitch these “hems” in place, but I have to confess that I never do. Who’s going look?

Now use your ruler and marking pencil to measure 3 inches from one seam line. I will be using my new fancy schmancy Sewline marking pencil that I LOVE. Roll the fabric tube and press a new fold directly on that line. This will expose 3 inches of fabric A on the B side and 3” of fabric B on the A side.

Now you have some decisions to make. Your valance can be hung in any of 4 ways. You have 2 options with the contrasting color at the top and two options with the contrasting color at the bottom. You also have to decide if you want the rod inserted at the top of the valance or if you prefer a 3 inch ruffle at the top. It probably took more time to create the handy-dandy video at the bottom of this post to show you the options than it will to make the enitre valance!

The only thing left to do is stitch in the casing lines, insert the rod and hang it in place. Ill post a photo of mine as soon as it is installed. That might be several days from now and about 15 minutes before company arrives!

Day 4, Seven Seams

Just seven more seams to join the rows together and the center of the queen size Japanese Jigsaw quilt will be assembled and I can take it off the design wall. It’s about time. This photo is the bottom half of the quilt which will attach to the top half from yesterdays photo.


I have a love/hate/love relationship with all of the projects I make. I love the beginning, the planning the excitement of a new project. The project looses its appeal when I have past the point of creativity and I no longer need my imagination to see what it will look like finished. The part when the instructions read “make 4 million identical units” is the moment when I start to loose interest. I’m also easily distracted (usually toward a new project) so I have to create ways to stay focused.

To get through the construction of all 88 units for this project I have been using a stack of small tumblers to keep me interested. We have an Accuquilt die cutting machine here at the store. In addition to being my favorite new toy, I “need” to make samples of the dies that we have so that customers can see what is available. I cut stacks of the small tumbler using my big bin of 1930’s reproduction fabrics. As I am sewing the JJ units together, I feed a pair of tumblers through at the same time. I clip the JJ unit off, press and add the next JJ unit. Before removing it from my machine I feed through another random set of tumblers. This process always keeps something under my needle. The entire quilt is chain pieced and as an added bonus, I was making a table runner size sample of the tumblers at the same time.

Unfortunately – or fortunately, I never calculated how MANY tumblers I would need for the table runner. I just cut, sewed and when a strip looked long enough I stopped adding to it. The plan was to work out the details when I thought I had enough. Judging from the strips I have partially assembled and the stack of tumblers I have yet to use, this table runner is going to be a baby quilt! One thing I know for sure, I either need to add many more red pieces or that one in the middle had got to GO!

Later today I will be starting a new project. The JJ quilt needs a rest while I contemplate the borders. Once those dreaded 7 final seams are together and I toss it on the queen size bed at our house to calculate borders, I will fall in love with it again.

Karen

Wednesday, March 25, 2009

Speed Bump.

If this were a sports blog you would all understand the term “rain delay”. My virtual retreat has run into a small “life delay”. Although I managed to get a few rows of the JJ blocks stitched together, progress has been minimal.

My appointment with my RJR Rep was longer than usual because he took the time to take several calls about his brand new granddaughter. And I do mean brand new, she was only about 3 hours old! We’ve known John for 15 years so it was fun to watch Grandpa get the news and share it with the brand new parents. We also managed to squeeze in a fabric order. Lynette is following the popular flower print with a pre-printed table runner panel for fall. Thimbleberry enthusiasts are going to love it. Don’t worry, we ordered multiple bolts.

Most of the afternoon was consumed with answering emails. Many of you either don’t want to comment on the blog or don’t know how. My inbox is full of fun comments, requests and questions. Yes, you can order the book, pattern and tools that I’m using on our website. Yes, I do have the best job in the world. No, my employees don’t get to sew at work and No, I don’t think they resent the fact that I do.

Yes you can cover the purse handles by folding the fabric over the belt webbing instead of making a tube. I own the tube turner (a set of Fasturn tools) and I use them regularly for all kinds of things.

The duffle bag in the CTO book is a larger version of the purse. It is the same duffle bag that Debby is teaching in class here at the shop. If you prefer to make the purse in class, Deb won’t mind. Check out the dates on our class schedule that is posted on the website.

Yes, we have plenty of the Japanese Jigsaw patterns and templates in stock. Don’t forget to apply Invisigrip to the back of the template before you start. It keeps the template from sliding (it works on all of your rulers too!)

Judith, glad I could help! Enjoy making the 3-6-9!
That woven border on the applique book IS easy - but you will have to wait for the pattern and instructions to see how I do it!

Now I’m going to sew. I really am…

Day 3, Quilt Delay

The problem with this “retreat” is that it is “virtual”. Every now and then I have to stop sewing and get some work done. Today that includes meeting with my RJR Rep to order new fall fabrics. John is one of my favorite sales reps and he works for the company that supplies us with Thimbleberries, Jinny Beyer and Debbie Beaves. With the popularity of the Thimbleberries giant flower panel, I hope Lynette is following it up with something wonderful.

Sifting through hundreds of new fabric swatches can take hours and I wont get back to my sewing machine until after lunch. Instead of a musical interlude, I thought I would provide you with a quilting interlude. In the process of getting ready for spring Quilt Market I am stitching up samples (work) using the solid batiks from the Timeless line. If you are a blog regular you will remember these as the projects that had to have 10 fabrics, no more, no less. All fabrics had to be batik solids and once I had used a shade in one quilt I couldn’t use it in another. (That’s why it is work).

These pieces are just a few of the new patterns we will be introducing at Market. Because Market is being held here in Pittsburgh, we wanted to feature Pittsburgh Quilters in our booth. I sent these quilts to 4 local quilters and told them to knock their socks off. I’m not sure that you will be able to see their fine workmanship in the photos, but if you are in the area, stop by to see them in person.

Mary Thomas quilted both of these baby quilts. I cheated a bit and made 2 quilts with 5 fabrics each. Mary does the most delicate all over pattern. The boys quilt has stars in the design and the girls quilt has hearts. We used the same piece of multi pastel backing for both quilts. I’ve managed to get the binding on both of these!

Rebecca Stahl quilted the project from the “dusty” group. I absolutely love the thread she selected. The center is quilted in an all over pattern using a variegated thread in earth tones. On the border she changed to a variegated color called “ocean” and added what the quilters call “pearls” in the dark teal blocks and cornerstones (technically the color name of that fabric is malachite). This one was returned in record time, so the binding is on it too. By the way, there isn’t any black in this quilt, it’s called “espresso”. Both of the variegated threads look great on the backing too!

Marsha’s daughter Heather quilted the Jewel Tone project. You may remember that I was debating on adding a simple border or an extremely complicated border to this quilt. Obviously I chose easy. Not because I wanted to get it finished faster. I chose the simple border because the blocks are SO easy that I wanted to be able to recommend this pattern to a beginner without hesitation. The name of Heather’s quilting business is “Heather’s Feathers”…. Guess what pattern she quilted on this project? Yep, feathers! There are a few areas of different size stippling and a casual design in the narrow border too. This piece will have dark binding to match the border as soon as I get it made. For the record, that's not just any old purple, its eggplant.


The appliqué project went to Susan Wick. In my opinion Susan drew the short stick. We allowed the quilters to select the quilt they would be quilting and Susan was “left” with the appliqué piece. I must say she did a stellar job! She quilted a very pretty vine on the outside border and added vines and details to the appliqué pieces. The topaz background color has multiple designs in the different areas for a truly custom look. I'm planning dark blue binding for this one.... I haven't made that yet either.

I’m thrilled with each of them! I know you are wondering and someone is always dying to ask. The answer is "Yes", I pay for my quilting. These women are professionals. We also recommend their service to our customers. If you are interested in having them work for you, call the shop for their numbers. 412-487-9532. We will be happy to provide you with that information so that you can deal directly with them.

I will be back sewing later today!
Karen

Tuesday, March 24, 2009

Sewing,sewing,sewing.....

It's been a busy day with lots of interuptions. In my time-laps world it is acutally 9pm. I've managed to turn the corner on the on the JJ quilt and with another row or two I will be half way finished. From that point on, working on the diagonal, each of the rows gets shorter and faster!

Stitching the blocks together once they have been trimmed is very easy. Nothing has to match! The only thing you have to keep in mind is that the blocks have to be off-set slightly to created "dog ears" on each end. Your stitching should start right in the "V" that is created by the dog ear on one end and end in the "V" created on the opposite end.

That same process takes place when you join the rows together. You have to shift the rows so that the intersections in the center of each design unit match. It isn't difficult, but it is one of the only areas I use pins.

Tomorrow I will keep sewing, one row at a time!

Ready Set Sew

Once again, I’m not following Tracey’s color plan. This blue and grey version is going to be a gift for friends that own a house in the islands. Their guest room needs a new bedspread and they are in the fabric industry, so I think it should be a quilt!

I suggest that you make a copy of the layout diagram that is included in the pattern. Before you all gasp and fall over dead that I suggested that you make a copy, this kind of copy is ok. It is for your own personal use. I’m not telling you to make a copy to sell or give away or in some way deprive the designer of her rightful fee. I’m telling you to make a copy of the layout diagram that you can mark-up, color, scribble on, without destroying your original pattern. That is perfectly OK.

Now you have to arrange your squares the way you would like to see them in the quilt. For this queen size project that layout would be massive. It would require my substantial design wall and then some. Instead, I arrange just one of the squares from each design element. Each square on the wall represents 4 pieces. They are arranged every-other-one because a grey background square goes in between each design element, but I see no reason to put them on the wall, I know where they go.

As you can see from the top corner, the rows will be assembled diagonally, so that is the way I choose to make the blocks. Instead of making all of the blocks before I start sewing them together row-by-row and cut them into shape as I go. When I have finished an entire row of blocks, I sew them together and add it to the body of the quilt.

This requires that all of those “layout” squares have to stay on my design wall until I finish putting this top together. I can’t layout anything new until I’ve finished piecing the JJ top! I need to get this one off the wall so that I can get this one ON the wall!


Here’s the step-by-step:


Make the 4 patch blocks using 2 squares of background fabric and 2 squares of print (from adjacent design units). This is where the copy of the layout comes in handy!

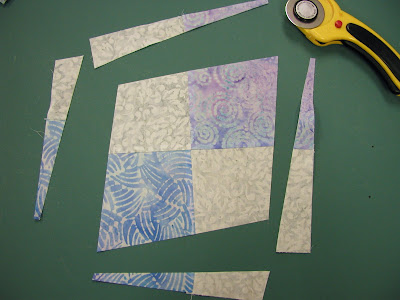
Press the 4 patch. Place the ruler over the block and align the lines printed on the ruler with your seam lines. Trim all 4 sides.

This block has the color on the “pointy” ends. The next block in the diagonal row will have the background on the pointy ends.

The pieces at the beginning and end of the row don’t have to be full blocks. They will be cut in half, so I only use 3 squares when I assemble them.

The center of this quilt will be 8 units by 11 units, that’s 88 blue blocks and 70+ background blocks… I better get sewing!

Day 2, Japanese Jigsaw

I doubt that today will be as productive as yesterday. As I have mentioned, I’m working a day ahead so today’s journal was really written on Monday to post on Tuesday, giving me time to type, edit the photos and prepare everything for the blog. Monday is a long day at the shop. I get here before 7:30 am and we don’t close until 9:00pm. I work the entire day, just like I have every Monday and Thursday for 15 years. I also have an appointment with a sales rep sometime this morning along with my normal responsibilities. I guess I better get started!

Today is Japanese Jigsaw day! This is a Tracey Brookshire pattern that I absolutely LOVE. It has everything I look for in a pattern. It is extremely easy, fun to put together and looks like it was WAY harder than it really was when you are done.

My first JJ experience was this small version. It is the wall hanging size in the pattern and I followed Tracey’s instructions exactly. The pattern is written so that each of the shapes is a different fabric. Nice, but not the “punch” I was looking for when I made the second, larger version to show of a new batik line at Quilt Market. The larger quilt done in neutral colors is the exact same pattern, I simply cut every other shape from the same fabric. This has been a customer favorite the entire time it has been hanging in our store… it is easy to see why!


Now it is confession time. The tan quilt is an entirely different size than the one featured in Tracey’s instructions. I made the neutral quilt using the sample pieces for a new line of batiks. They “air in” a very limited amount of yardage from Bali for those projects and I used every thread I had available of the tan background print. I didn’t think Tracey’s was the wrong size, I couldn’t possibly make mine larger and have it finished on time. I think that caused Tracey some headaches caused by people that wanted theirs exactly like MINE. –sorry Tracey!

The truth is, you can make YOURS any size you want. If you just want to TRY the technique (which I have to admit is irresistible) make enough blocks for a table runner! You will need the pattern (available on our website) AND I highly recommend that you purchase the ruler (also available on our notions page). A paper template is included in the pattern, but the ruler is well worth having. That probably comes as a surprise to those of you that know me well. I generally refuse to invest in a new tool that does just one thing. Like Alton Brown from the Food Network, I like my tools to be multi purpose. The JJ ruler is an exception to that rule. I also like this pattern so much that I am willing to make it more than once, another unusual occurrence for me.

I think I should give you “the good news and bad news” about this project before we get started. The good news is, you are going to love making this. It is just plain fun. The bad news is, there is A LOT of waste. Not so much to prevent you from trying the technique, but enough that you need to pay very close attention to how much fabric you are buying. For the tan quilt I used 3 yards of background just in the CENTER of the quilt. The borders were extra. More good news, the block construction is a simple 4 patch. That’s it, 4 squares. After you create the 4 patch blocks you trim them into the diamond shapes. That creates the waste.

It is easy to calculate how much fabric you need. Decide how many “shapes” you want to create and count the number of squares you will need. Each shape requires 4 squares. There are plenty of quilters math books that help you with these calculations. I think every “great” quilt shop should have one on their cutting table. We do!

A little later I will post the step-by-step photos of the construction technique. In the mean time, several people have emailed me because they don’t know how to “comment”. It’s easy. Click on the little word “comment” at the end of this post. That will take you to a page where you can type your message. Your comment will not appear on the blog, you have to click on “comment” to read the list. If you get a message saying you are not a member, feel free to sign-up, it’s free.

Later,
Karen

Monday, March 23, 2009

I follow the booklet guidelines pretty closely to put in the zipper and attach the sides. You don’t really have to “insert” a zipper, you simply lay the zipper along the raw edge and stitch. The zipper is too long for the bag, so the bulky zipper pull and the metal end are at least an inch from where you are sewing. After you stitch the first seam, fold the zipper back, press and top stitch the seam allowance to hold it in place. I like to use a large multi-stitch zigzag to do that. No special reason, I just think it looks nice.

I quilt the end panels as directed and then I use flannel between 2 layers of fabric for the outside pocket. Another layer of batting is too bulky and just a layer of fabric doesn’t have enough body. I think the flannel is just right.

Oddly enough, this is where I realized I did something wrong. Remember when I told you I rounded the corners because I like it better that way? Rounding the corners reduces the circumference of the end piece. The pattern requires a 25 inch length for the body. I increased my length to 26 inches instead of reducing it to 24 inches! Oops. I’m going to have “puffy” corners. That’s ok; I can live with puffy corners. As you can see, I had quite a bit of easing to do!

I added my favorite zipper pull and I’m done! Project #1 for this week is complete. For the next few days I think I will work on the Japanese Jigsaw quilt.


Day 1, part 2

I'm back!


After the quilting was complete I trimmed the body of the purse to measure 12 inches by 26 inches. I also marked a line 2½ inches in from each long side (that line stops 3½ inches from each short end) to position the handles. This is where CTO and I part ways on instructions. I prefer that my handles be 100% cotton webbing covered in fabric. Many purse patterns instruct you to use batting inside the handles. I think that batting stretches too much and if you really load your purse (mine usually has my computer battery, mouse, power cord and 100 other things) when the handles stretch, the stitches pop. One inch cotton webbing not only holds up better, I think it feels better in your hand.

I cut 2 widths of fabric 3 inches wide and stitch them together end-to-end on a 45 degree angle to make the handles. This is the absolute minimum length for this handle. It sits nicely on my shoulder and my purse tucks under my arm. If you have a bulky coat you might want to add another half width of fabric to make them longer.


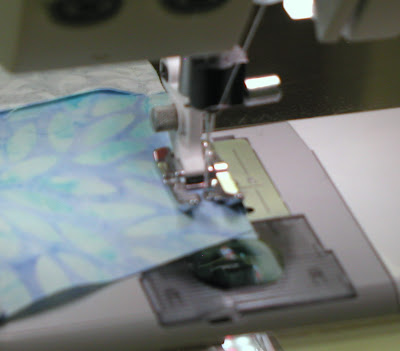
To stitch the length of the handle fabric I make a guide using a Sewing Edge Tool. That’s the purple strip on the right side of my needle. It is a repositionable guide that allows me to stitch a tube that is slightly wider than the webbing. The 3 inch strip makes a hefty seam, but it also makes it easier to stitch. I press that seam open before using the Fasturn tool to turn the tube right side out and insert the webbing. Then, using my walking foot, I stitch down both sides of the handle.


This photo shows how I match the center of the handle to the center of the bag and align the handles with the positioning lines. The open ends meet one another on the opposite side. The joint is on the very bottom of the bag, so I don’t worry about sewing it together. I just fold the fabric under and butt the ends together. To attach the handles you have to stitch through all of the layers directly over the same stitching lines. This isn’t as hard as it seems, but it does help to have a sharp needle!


If you are interested in any of the items I’ve talked about, including the needles, Sewing Edge or the CTO Totes with Zippers book, they are available on our website. Check back a little later, I'm finishing this project before 5:00 today!

Virtual Retreat, Day 1

I have a confession to make.

I started the virtual retreat without you. It dawned on me that doing the sewing, editing the photos and creating the posts wouldn’t allow me to actually get the post on the blog in a timely fashion. So I started early. I really didn’t have a choice, I’m not actually ON retreat this week, I’m working. I have to squeeze the sewing in between my normal schedule here at the store.

Here is day one – on 24 hour delay.

I promised that a new purse would be my first project. I honestly think selecting the fabrics for this project takes me longer than the actual construction. The CTO pattern booklet that I use (Totes with Zippers) suggests using just one fabric. I decided to make a change. Instead of one fabric I’m using the 3 batik prints for the outside and the solid blue for the lining and handles.

I always keep a stash of zippers available because we don’t sell them in the store. There is nothing special about the zipper for this project, other than it should NOT be metal. The pattern recommends a 14 inch zipper. I usually buy 22 inch for my stash. Too long is just fine, too short is always a problem, I suggest stashing 22 inch if you don’t know what you will be using it for. Any of the ones shown in the photo would work, but I think Ill go with the blue that matches the lining fabric.


Hopefully you can see the pattern page that comes bound inside the instruction booklet. Notice that the pattern for the end panels has pointed corners. That’s my pattern, with adjustments lying on the fabrics. I’ve decided that I prefer my corners rounded, so I rounded them. This allows me to ease the fullness into the corners and, well, I just like rounded corners better!

One of the first steps in the instructions is to quilt the 2 layers of fabric together. Cindy suggests a diagonal grid. Because I have decided to piece my fabric, I’m going to do the piecing and quilting in one step, Flip’n Strip style. This requires that you use fusible batting and press the backing fabric to the batting. That holds it in place so that the layers don’t shift as you add the strips.


For this purse I’m using a scrap of non-fusible batting that were leftover from a quilt. To fuse the layers together I took the pieces outside and spritzed them with a little spray glue. I’m not a big fan of spray glues, mostly because of the overspray. I also don’t think they should be used in quilts because we don’t know their long term affects on fabric. For this purse (which will be abused) I think it is just fine.


The Flip’n Strip method is exactly the same process we use in our table runner pattern of the same name. You simply start in the center with your first strip face up. Place the second one on top, face down. Stitch along one side, through all layers. Open the strip and press it to one side. Repeat the process, adding strips to each side until you have covered the required area. It is assembled and quilted at the same time. I want the piece for the purse to measure 26 inches, so I cut the strips 2½ inches. They will measure 2” on the finished purse…… Hey! I should have used a Jelly Roll!


Although the quilting is technically done because I've attached the layers together. Ive decided that I want some quilting lines that show too. I'm going to stitch 1/4 inch away from the edge of each strip before I trim it to add the handles.


Ill be back to share the assembly process later!


Karen


Friday, March 20, 2009

Have vs Want

I’ve had several family, friends and customers comment on the fact that I am planning a virtual sewing retreat here on the blog next week. They all find it very funny that I will be coming to work, blogging about sewing (which is what I try to do everyday) and I am calling it a “retreat”. There is no way I am going to make them understand the difference between “have to sew” and “want to sew”.

If you have ever been talked into “helping” with a project (and we all know what “help” means to the non-sewing public) then you understand “have to sew”. Requests for those projects usually come from people that have no clue what they are asking. They start with “I hate to ask, BUT, could you ……… fill in the blank. In my experience that blank has been filled with “make a queen size quilt for our raffle”, “make a canopy for our daughter to get married under (using silk squares decorated by our non-sewing friends)”, "Fix my daughter's wedding dress", “Help the 1st grade make a quilt”, “Sew this button on my pants”…. Oh, wait, that last one was a request from my husband. I’m pretty sure I accomplished that while the pants were still in style.

In preparation for my week of “want to sew” I decided to finish up a “have to sew” project. An old friend asked me to add borders to a quilt top that her grandmother had started to make it fit her king size bed. The request was made last summer with a “No hurry” comment. (A word to the wise: Never say “no hurry” to me. My life runs on deadlines, no deadline… probably not going to happen).

Amy and I have been friends since Middle School. I knew Grandma Kinter, she was a wonderful farm wife with a kind and generous heart who created hand pieced and hand quilted projects for all of her kids, grandkids and I’m sure a few great grandkids before she died. This green and white Drunkards Path project would require 20 inches of border on all 4 sides to come close to fitting her granddaughter’s bed.

When I am asked to finish an old project I can’t help but wonder what the original quilt maker would think about the process. Do you think Grandma K. was looking down on me, marveling at my new fangled computerized sewing machine attaching borders to her quilt bocks that she assembled with tiny hand stitches? Maybe she was wondering why her quilt top couldn’t be finished as is, without a border to fit a bed? I know I would like to ask her how the blocks came to be set in such a unique pattern. It is symmetrical, it works, but it isn’t something I’ve seen done before. Do you think it is possible that she never finished this project because she considered the setting a mistake? Is she laughing at the fact that her granddaughter is investing hundreds of dollars finishing a “goof” to decorate her bedroom?

No matter what Grandma had originally intended, her green and white Drunkards Path quilt now has 20 inches of border added to each side made up of 3 different fabrics, 4 strips and mitered corners. I hope both she and Amy are happy. I know I am, because now I can check that off my list!

Thursday, March 12, 2009

Time for a Change

I need a new bag, purse, tote, whatever you want to call it. The container that I schlep everywhere I go is looking a bit ragged. Some would say that it looks a bit more than ragged. It started to show some wear and tear last fall and instead of replacing it, I tossed it in the wash. I didn't want to give it up, I just couldn't find the time to make another one. I like carrying a fabric purse rather than a leather one. Fabric is what I do and this poor old bag is made from a line that I designed (two years ago!). I agree that your accessories say something about you. Right now, my purse is whispering not so nice things about me.


Why am I telling you this? Because announcing it publicly will force me to do something about it. Self induced peer pressure. I will now be forced to stop fantasizing about the purse that I would, could, should, make and get down to business. I can end the delusion that I have a million patterns to choose from and admit that in the end I am going to make, yet another, roll bag from the Cindy Taylor Oates book "Totes with Zippers". I love that pattern. It is the bag I want to carry. It has outside pockets for my keys and cell phone, it holds tons of stuff, it zips closed and the handles wrap all the way around the bottom to support as much weight as you can stuff into it. It is the pattern that I have chosen for the last 5 purses I've made for myself.

A new purse will be project #1 for Spring Break week here on the blog. Starting March 23 I'm going on a sewing spree and you are welcome to come along with me. 95% of the sewing that I do is "required". Samples for fabric lines, shop display, pattern fronts. Very little is sewing that I "want" to do for family, friends, or myself. I've decided that the week of March 23, I'm taking my own personal spring break. I am going to sew everything I've wanted to do and nothing else for 5 solid days. (Not really "everything". That would take much longer than just one week!) You are welcome to log on, follow along, or join in the fun and work on projects along with me. Think of it as a virtual retreat. I plan to post at least twice each day to show you my progress.

Right now I'm planning a new purse, a queen size Japanese Jigsaw quilt, and a graduation quilt for Lindsay. Don't let that photo of the Japanese Jigsaw scare you. Mine will be made with beautiful shades of blue batiks and a pale grey background. I'll show you how I "fix" Tracey's pattern to get the look I want. There is also a baby quilt that I would like to get done, a duffel bag, a few table runners and I could use a new jacket for Market........ I am sure that there will be more!


Karen

Monday, March 2, 2009

Home.... again.

I was in Florida yesterday…. and Georgia, and North and South Carolina and both Virginia and West Virginia.

Friday I flew to Jacksonville Florida to visit the University of North Florida with my college bound daughter. Lindsay was born in Florida and we prepaid her college tuition before her first birthday on the off chance that she would want to go to school in Florida. The program will refund your investment with a bit of interest if your child decides to attend school outside of Florida (Like Lindsay’s older sister). Unlike her older sister, Lindsay doesn’t think she will have any trouble studying with palm trees on campus.

We’ve looked at several Florida Universities and although she liked them, Lindsay was undecided.
Within hours of arriving on campus I snapped this photo and at that very moment I knew that we were going to be the parents of a UNF freshman next fall. To Lindsay, it felt like home.
The 80 degree temperature didn’t hurt either. Debby helped by text messaging us the weather report from Pittsburgh on Saturday morning “18 degrees and snow flurries” as Lindsay was walking around in her flip flops.

As a parent I prefer to think that Lindsay’s decision was based more on her discussions with the department heads than fact that campus is just 8 miles from the beach. (stop laughing!)

We did check out the beach and even a few quilt shops. We ate lunch on the patio of the restaurant, did some shopping to enjoy the weather and by the time I crawled into bed on Saturday night, I was convinced that it was the best trip possible.
I should have checked the Weather Channel

We intended to fly home yesterday. If you know anything about my travel woes, the following will not surprise you.
All went well until we checked out of the hotel, returned the rental car in a slight drizzle and went to check in for our Delta flight. Due to bad weather, ALL flights were canceled that went through Atlanta. If you have ever flown on Delta, you already know that ALL DELTA flights go through Atlanta. By the time I waited in the mob to get to the customer service desk, they had already graciously re-booked us on a flight that would get us home TUESDAY morning instead of Sunday afternoon.
To fly home I was going to have to re-rent a car (hotels with shuttles were already full) check back into a hotel (at my expense, airlines do not compensate for weather related delays) and wait 30+ hours to return to the airport in hopes that the weather cleared in time for our flight – which had a 6 hour layover in Atlanta.

Lindsay had a huge anatomy test 3rd, 4th, and 5th period today. I have a class tonight and I had the computer with all of the handouts with me. Instead of sitting around hoping for the best, we hit the rental car counter, secured a car, and drove home – through the weather that wouldn’t allow planes to fly. Being from Pittsburgh I am use to ice and snow (people in North Carolina are not, which is why we counted 13+ cars that had lost control and ended up meeting tow truck drivers and state troupers yesterday). Actually, it wasn’t that bad. All 13 hours and 18 minutes through 7 states and every type of weather you can imagine were spent with my daughter that I am going to miss next year. It was a long day, but we are home safe, the college decision is made, and now my biggest concern is how to keep an acute case of “senioritis” from setting in!